![]()
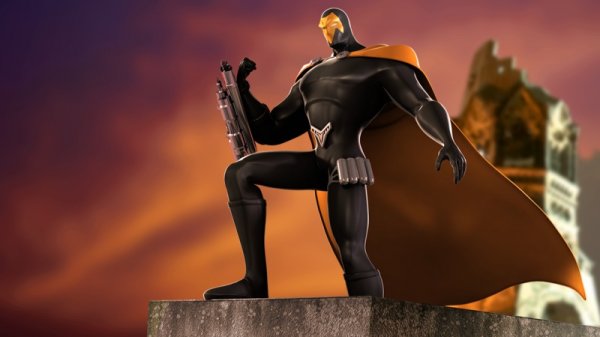
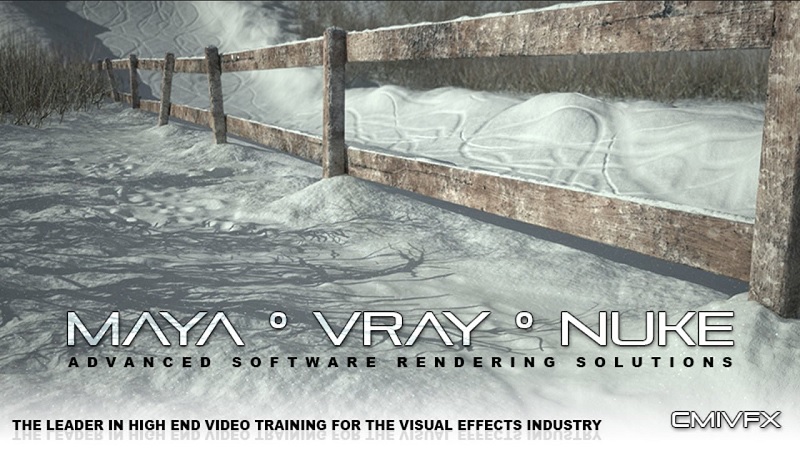
در این آموزش مدرس Paolo Copponi نحوه ساخت یک منظره برفی را با استفاده از نرم افزار های Nuke ، Maya و V-Ray و Photoshop آموزش میدهد. ساخت صحنه های برفی در انیمیشن برای بسیاری از کاربران مشکل است، در این آموزش او نحوه مدلسازی این صحنه را در نرم افزار Maya، رندرینگ آن در موتور رندر V-Ray و کامپوزیت نهایی را در نیوک و فتوشاپ انجام میدهد. هر قسمت مهم و سخت این آموزش را به طور مفصل به شما آموزش میدهد. این آموزش شما را از یک صحنه سیاه تا یک صحنه ی بسیار واقعی راهنمایی میکند، همچنین نحوه بالا بردن کیفیت و نیز متقابلا بالا بردن سرعت خود در این نرم افزار ها به شما آموزش میدهد.
مشاهده توضیحاتــ انگلیسی
and#96;cmiVFXand#96; has released Snowy Landscape Complete. This project based course takes on the challenge of a snowy landscape. Snowy visuals in animation are quite complex and can be a challenge to the most experienced TD. The organic shape, depth and sparkles of snow are all difficult features. Together in a single scene they can be maddening. Paolo Copponi has taken on this challenge. Paolo will model in maya, shade in VRay, and compose in nuke. Every stage of this complex scene is covered in detail. This beginning-to-end approach in a lesson, takes the student from a blank screen to a complete REEL clip. This production pipeline is intended to achieve the balance between quality and speed that can be difficult with VRay. VRay materials, lighting and rendering can be a bear. He takes VRay further by setting up passes and elements for NUKE compositing. The VRay to NUKE pipe alone is worth this small cost. This is an intermediate to advanced lesson. The tools taught here require: Maya, VRay, Nuke and Photoshop. Trial versions of each should suffice to follow along. ITALIAN Disponibile in lingua italiana e inglese, questo progetto intermedio comprende la pipeline tra: Maya, Vray e Nuke. Per questo bellissimo paesaggio innevato tutte le fasi vengono insegnate per fornire allo spettatore una completa e amichevole "production pipeline".
Chapter Descriptions
Project Overview
In this series of lessons we will explore the techniques for create a realistic snowy landscape using VRay in Maya, Nuke and Photoshop. In this first chapter I will explain the structure of the project and I will show you all the parts that we will find along this learning path.
Modeling The Scene
In this section we are going to see the modeling techniques for the base of snow and fence, and the use of Maya visor to build the vegetation.
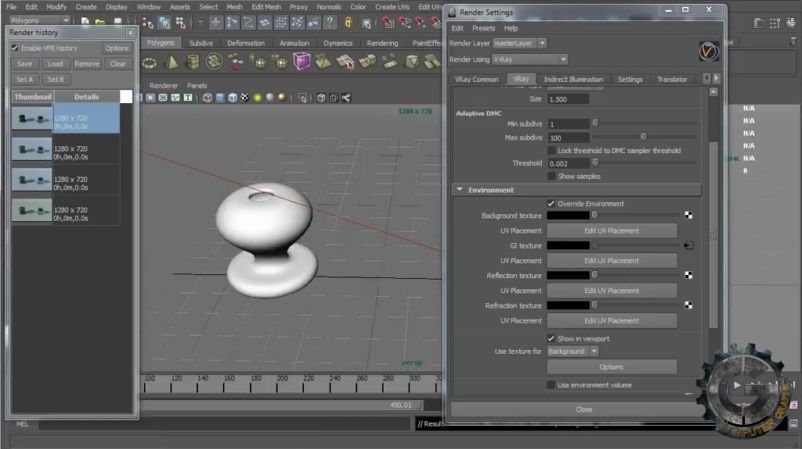
VRay Settings and Lighting The Scene
This section shows how to setup the VRay rendering engine, in particular i will show how to use the environment setting (gi, reflection and refraction texture), and the Indirect illumination setting. VRay has different type of light but for this tutorial we will use the VRayGeoSun and the VRayLightRect.
VRay Materials
The VRay materials are provided with a V-ray renderer. In this section I will show the principal materials that we are going to use in the next chapter for the construction of snow shader. The materials that will use are: VRayMtl, VRayFastSSS2, VRayBlendMtl and VRayBumpMtl.
Snow Displacement Map
This is one of the most important part for the creation of a snowy landscape. I will show how create ad UV texture map for the snow, how export the map in Photoshop and how to create a correct displacement map. The fundamental thing for the creation of the snow is the displacement map and how it works.
Snow Shader
In this area I will show how to create a shader for the snow through the materials that we learned in chapter 4 and I will explain how create the sparkles effects for the snow. We will use Photoshop to create a map for sparkles.
Ice Fence and Vegetation Shader
In this chapter I will show you how create a shader with an ice effect for the fence and vegetation. We will create a UV map for the object and then we will create a texture for this element in Photoshop.
Render Snow And Sparkles In Different Render Elements
To create the sparkles effect we need to render the snow and sparks separately using the "material select" render element. This will be useful in the last chapter when we will compose the scene in Nuke.
VRay Render Elements
Overview of the most important render elements. I will show how to export different render elements to obtain a total control of the image in Nuke. In particular we will see two new render elements, The V-ray multi matte and the V-ray Z-depth.
Nuke Bonus
In this last chapter we will learn how compose the VRay render elements in Nuke. We will do some adjustment for the color correction, we will add a depth of field and a glint to the sparkles.
Bonus Chapter
In this chapter we will see how to adjust all the nodes in nuke for the animation.
About The Instructor
Paolo Copponi is 27 years old and I come from Italy. I'm a 3D Maya Artist specializes in VFX, Lighting and Rendering and Digital sets. Currently I'm based in Italy and I work as a freelance. In 2010 I obtained the university degree in theory and techniques of visual communication and multimedia from the Academy of fine Arts in Macerata (Italy), with vote 110/110 cum laude. In 2011 I went to Los angeles and I specialized in 3d visual effects.
3D World Interview:http://www.3dworldmag.com/2012/08/08/meet-the-3d-artist-paolo-copponi/
Paolo Copponi REEL:https://vimeo.com/46030688
Contact:paolocopponi1986@gmail.com
Project Contents
All cmiVFX videos come with all the training materials you can need right from our website. No matter what time of day, your location, or how your feeling, cmiVFX will be there waiting for you!
///////////////// ITILIAN INFORMATION ///////////////////
Descrizione capitoli.
Capitolo 1. Project Overview
In questa serie di lezioni andremo ad esplorare le tecniche per creare un realistico scenario innevato usando Vray in Maya, Nuke e Photoshop. In questo primo capitolo vi spiegherandAtilde;andscaron; la struttura del progetto e vi mostrerandAtilde;andscaron; tutte le parti che troveremo durante questo percorso.
Capitolo 2. Modeling The Scene
In questa sezione vedremo le tecniche di modellazione per la base della neve e per la staccionata, e l'uso del Maya visor per costruire la vegetazione.
Capitolo 3. Vray Settings and Lighting The Scene
Questa parte mostra come impostare il motore di rendering Vray, in particolar modo l'uso degli enviroment setting ( GI, riflessione e rifrazione ), e i settaggi dell'illuminazione indiretta. Inoltre vedremo due particolari tipi di luce che ci fornisce Vray, La Vray geo sun e La vray rect light.
Capitolo 4. Vray Materials
I materiali di Vray sono disponibili con il motore di rendering Vray. In questo capitolo vedremo le principali caretteristiche dei materiali che andremo ad usare, nei prossimi capitoli, per costrurie lo shader della neve. I materiali che utilizzeremo sono: VrayMtl, VrayFastSSS2, VrayBlendMtl e il VrayBumpMtl.
Capitolo 5. Snow Displacement Map
Il capitolo cinque andAtilde;andlsaquo; uno dei piu importanti di questo tutorial, vedremo come creare una buona uv texture map per la neve, come esportarla in photoshop e come creare la displacement map. La cosa fondamentale per ricreare un terreno innevato andAtilde;andlsaquo; la displacement map.
Capitolo 6. Snow Shader
In questo capitolo vedremo come usare i materiali spiegati nel capitolo 4 per creare lo shader della neve e come crearne l'effetto scintillante, useremo Photoshop per creare la mappa per rendere la superfice brillante.
Capitolo 7. Ice Fence and Vegetation Shader
Nel settimo capitolo continuiamo con la costruzone degli shader, creeremo uno shader che dia un effetto ghiacciato alla staccionata e alla vegetazione. Inoltre vedremo come creare un uv map per la staccionata e come texturizzarla in modo corretto con photoshop.
Capitolo 8. Render Snow And Sparkles In Different Render Elements
Per creare l'effetto brillante, abbiamo bisogno di renderizzare separatemente la neve e i brillantini, per fare ciandAtilde;andscaron; useremo il "material select" all'interno dei render element. Questo ci sar"andiexcl; utile nell'ultimo capitolo quando compositeremo l'immagine in nuke.
Capitolo 9. Vray Render Elements
Panoramica dei render element piu importanti. Vi mostrerandAtilde;andscaron; come esportare differenti render element per ottenere un controllo totale dell'immagine in Nuke. In particolare useremo due nuovi render element: il Vray multimatte, e il Vray zdepth.
Capitolo 10. Nuke
Nell'ultimo capitolo vedremo come compositare in nuke gli elementi di rendering di vray. Aggiusteremo l'immagine attraverso il color correction, aggiungeremo il depth of field e l'effetto glint alle scintille.