ورود به حسابــ کاربری
عضویتــ در سایت کلمـه عبور را فراموش کرده اید؟

    آموزش بوت کمپ در آنریل اینجین - قسمت 2


    UNR208 - Unreal Engine Bootcamp - Part 2

    آموزش بوت کمپ در آنریل اینجین - قسمت 2

    Unreal Engine Bootcamp، قسمت 2 مقدمه ای گسترده و مفصل برای استفاده از Unreal Engine برای ایجاد صحنه های فوتورئال سینمایی برای سینماتیک ها ارائه می دهد. این به ویژه برای هنرمندان VFX طراحی شده است که می خواهند اولین گام های خود را در Unreal Engine بردارند و دانش خود را در یک موتور بازی بیدرنگ پیشرفته به کار ببرند. این ادامه‌ی بخش Unreal Engine Bootcamp، قسمت 2 است که قبلاً منتشر شده بود

    این دوره شامل نرم افزارهای مختلفی از جمله Autodesk Maya، Substance Painter، World Creator، Metahuman Creator و سیستم پلاگین آب برای Unreal Engine خواهد بود.

    لیام وایت هاوس یک هنرمند ارشد VFX مستقر در استرالیا است که از سال 2003 در صنعت سه بعدی فعالیت داشته است. او در 18 سال گذشته روی پروژه های مختلفی کار کرده است، از جمله اخیراً محیط های عمیق دره ای واقعی برای The Falcon و Winter Soldier در دیزنی پلاس، و محیط‌های زمین توخالی برای Godzilla vs Kong، و همچنین کار VFX روی دیگر فیلم‌های بلند و سریال‌های اپیزودیک آینده.


    لیست کلاس :

    • کلاس 1: UE Nanite هندسه و Lumen Realtime Global Illumination
      مقدمه‌ای بر سیستم‌های UE Nanite Geometry و Lumen Realtime Global Illumination در Unreal Engine. Nanite یک سیستم هندسی با وضوح بالا شگفت انگیز است که به عنوان یک نسخه جغرافیایی از بافت مجازی طراحی شده است که اجازه می دهد تا مقادیر زیادی از داده ها را تنها بر اساس آنچه دوربین می بیند و امکان چندشماری عظیم در دارایی ها را می دهد، به پنجره نمایش منتقل شود.
      قبلاً مدل‌های Zbrush در نقشه‌های معمولی پخته می‌شدند که سپس برای ایجاد انحنای جعلی و جزئیات در هندسه پلی کم استفاده می‌شد، اما اکنون هندسه چند ضلعی بالا را می‌توان به مش‌های Nanite تبدیل کرد و در ویوپورت با نرخ‌های فریم بالا شگفت‌انگیز که قبلاً برای پلی‌های بالا در دسترس نبود، قابل پخش است. شمارش می کند.
      Lumen یک سیستم نورپردازی غیرمستقیم بیدرنگ فوق‌العاده است که در Unreal Engine 5 جدید است که اجازه می‌دهد با استفاده از نقشه‌های نوری، نور جهشی پویا را بدون ایجاد نور در محیط ایجاد کنید. این بسیار واقع گرایانه است و دارای نور و رنگ سینمایی زیبا منعکس شده از مواد موجود در صحنه و همچنین سایه های ملایم در قسمت های سایه دار محیط است. ما نگاهی به نحوه تنظیم آن در یک صحنه نمایشی با اجرای سبک خواهیم داشت.

    • کلاس 2: بافت مدل های سطح سخت
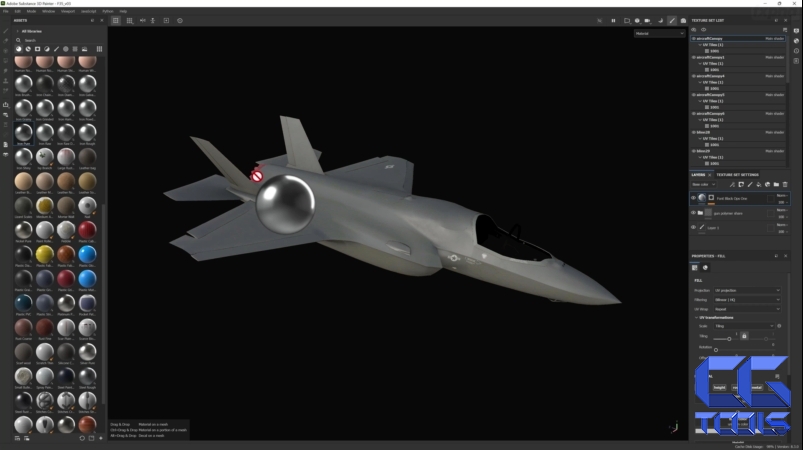
      در کلاس دوم، فرآیند استفاده از Autodesk Maya و Substance Painter برای کامل کردن تکسچر مدل‌های سطح سخت برای Unreal Engine را خواهیم آموخت. Autodesk Maya یک استاندارد صنعتی برای وسایل نقلیه، محیط‌ها و مدل‌های شخصیتی با جزئیات بالا است و می‌توان آن را با Unreal Engine جفت کرد تا دارایی‌های بسیار دقیق و جعلی را ایجاد کند که می‌تواند در سینما استفاده شود. با تنظیم مواد در مایا، دارایی ها را می توان به Unreal Engine برای تخصیص مواد وارد کرد.Substance Painter یک نرم‌افزار بافت‌سازی هوشمند است که می‌تواند از انحنا، انسداد محیط و ضخامت مدل‌های سه‌بعدی برای اضافه کردن مواد هوشمند خودکار به دارایی‌هایی مانند خراش، پیری، فرورفتگی و غیره استفاده کند. به دلیل داشتن کتابخانه گسترده، به ابزاری بسیار ارزشمند توسط هنرمندان بافت تبدیل شده است. بافت های از پیش ساخته شده و سیستم نقاشی و عکس برگردان بصری و کاربرپسند است. ما بافت هایی را در Substance Painter برای جت ایجاد می کنیم و سپس آن را به Unreal Engine وارد می کنیم.

      کلاس 3: مواد فیزیکی
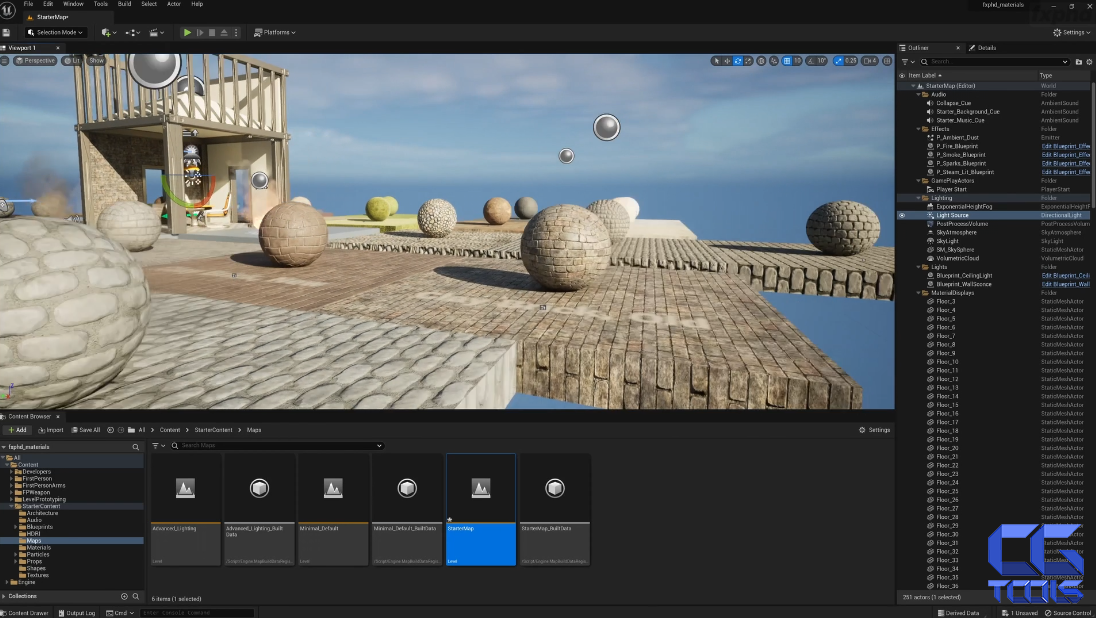
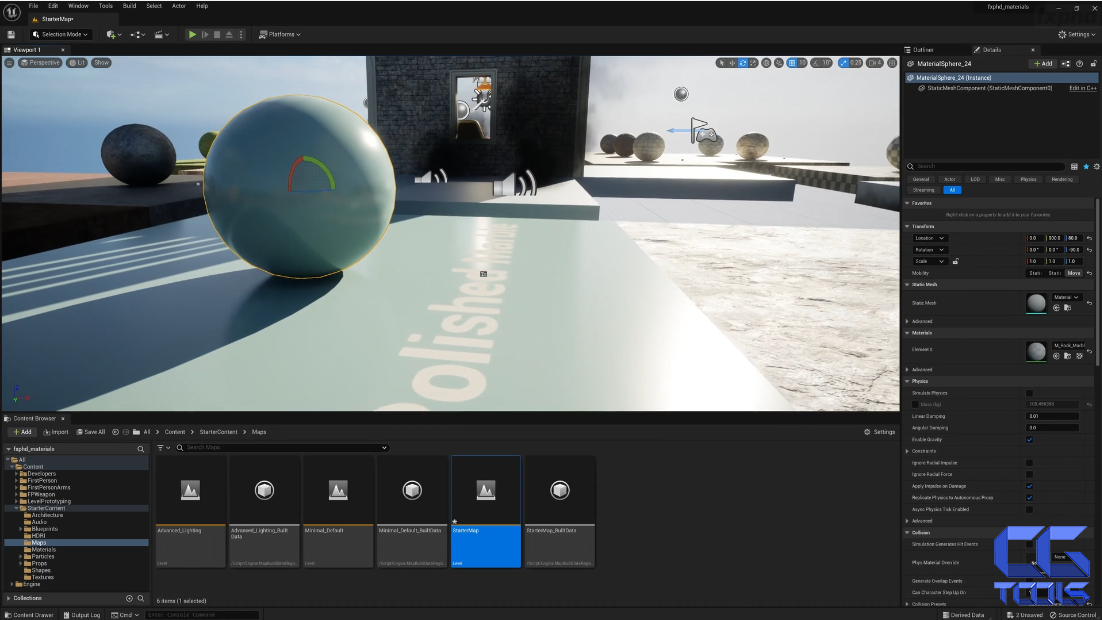
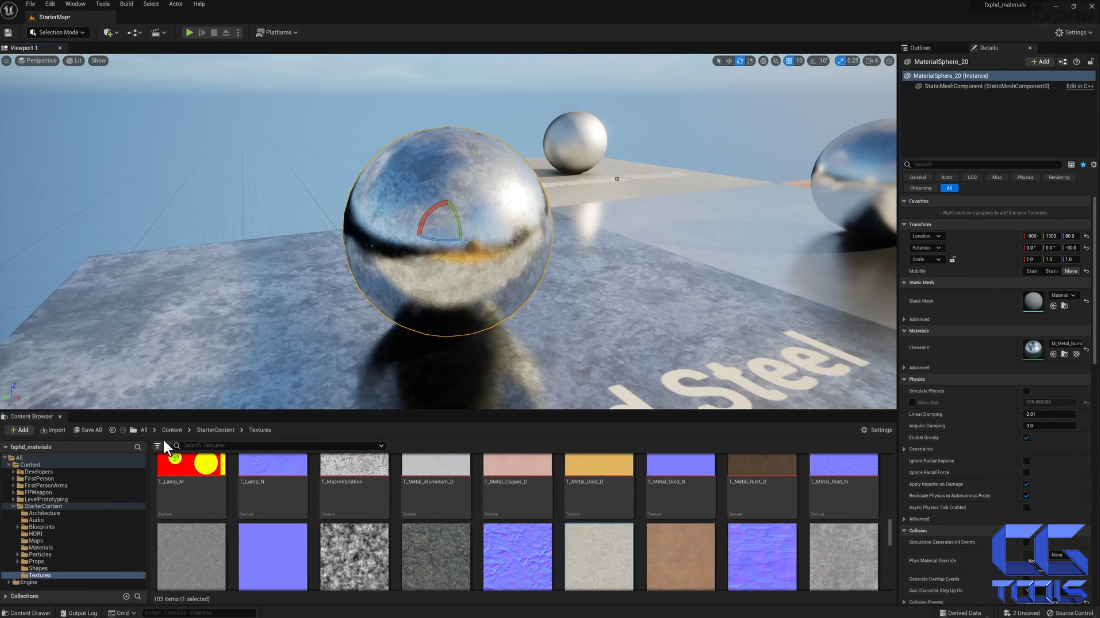
      در کلاس سوم ما به مواد فیزیکی در UE5.1 می پردازیم و به تخصیص مواد برای مطابقت با تصاویر مرجع عکاسی می پردازیم. با استفاده از بافت‌ها و متریال‌های خود از Substance painter، آنها را به یک شبکه مواد در Unreal Engine متصل می‌کنیم و تنظیمات متریال را شماره‌گیری می‌کنیم تا بهترین نتیجه را بگیریم. فرآیند ایجاد مواد در Unreal Engine با استفاده از سیستم مبتنی بر گره برای Master Materials و ویژگی‌های موجود در Material Instance بسیار آسان است. ما مواد را در یک صحنه نمایشی آسان برای پیگیری تنظیم می کنیم و سپس به ویرایش مواد موجود در دارایی جت خود ادامه می دهیم.

      کلاس 4: مبانی خالق فرا انسان
      مقدمه ای بر Metahuman Creator برای ساخت مدل های شخصیت برای UE5. Metahuman creator یک سیستم خلق کاراکتر جدید است که به انسان‌های دیجیتالی از پیش ساخته یا سفارشی اجازه می‌دهد تا در یک رابط کاربری گرافیکی خلق کاراکتر با استفاده آسان، اصلاح و تنظیم شوند. به جای اینکه مجبور باشید یک شخصیت را مدل، ریگ و بافت کنید، می‌توانید به راحتی بین از پیش تنظیم‌های مختلف انتخاب کنید و سپس مو، چشم، پوست و ویژگی‌های آن‌ها را با استفاده از کنترل‌های ساده سفارشی کنید. ما کاراکتر فرا انسانی خود را ایجاد می کنیم و آن را به UE5 صادر می کنیم.

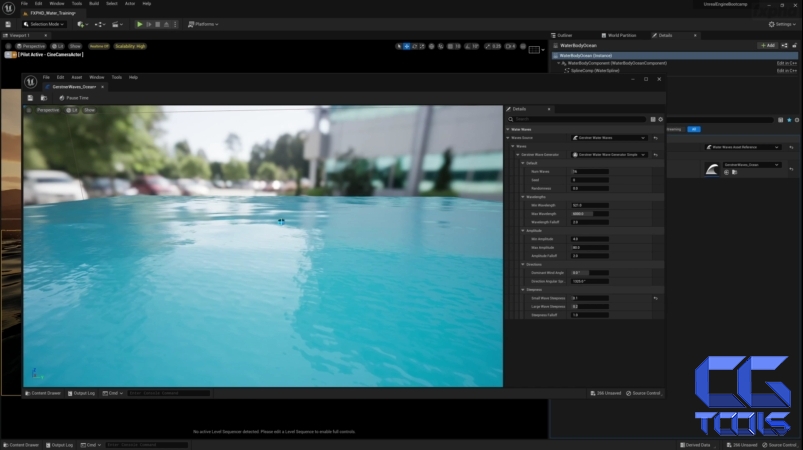
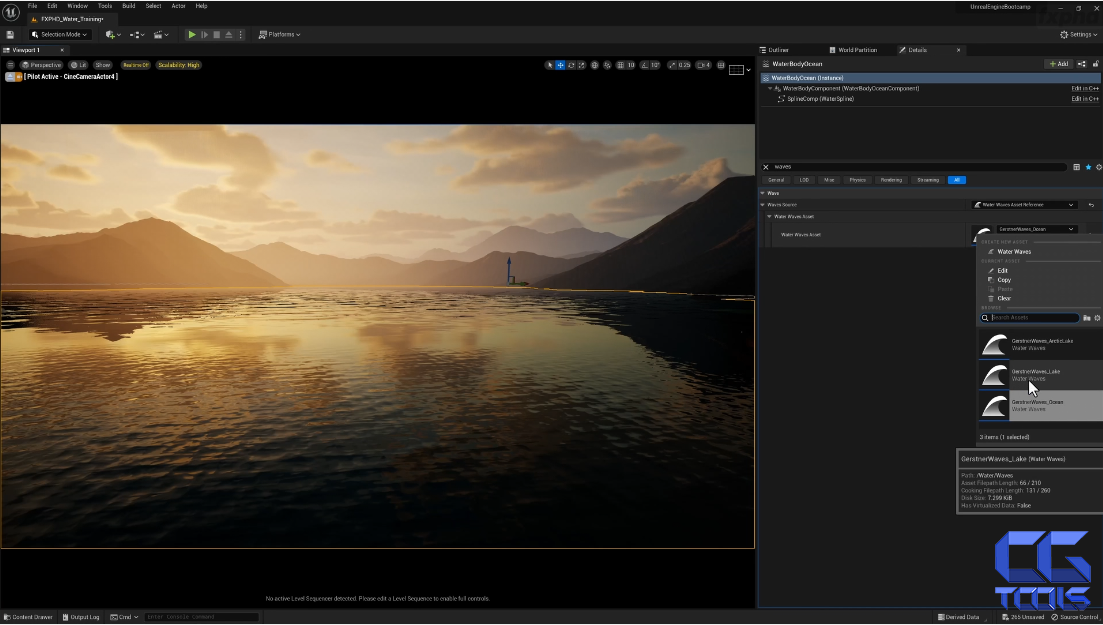
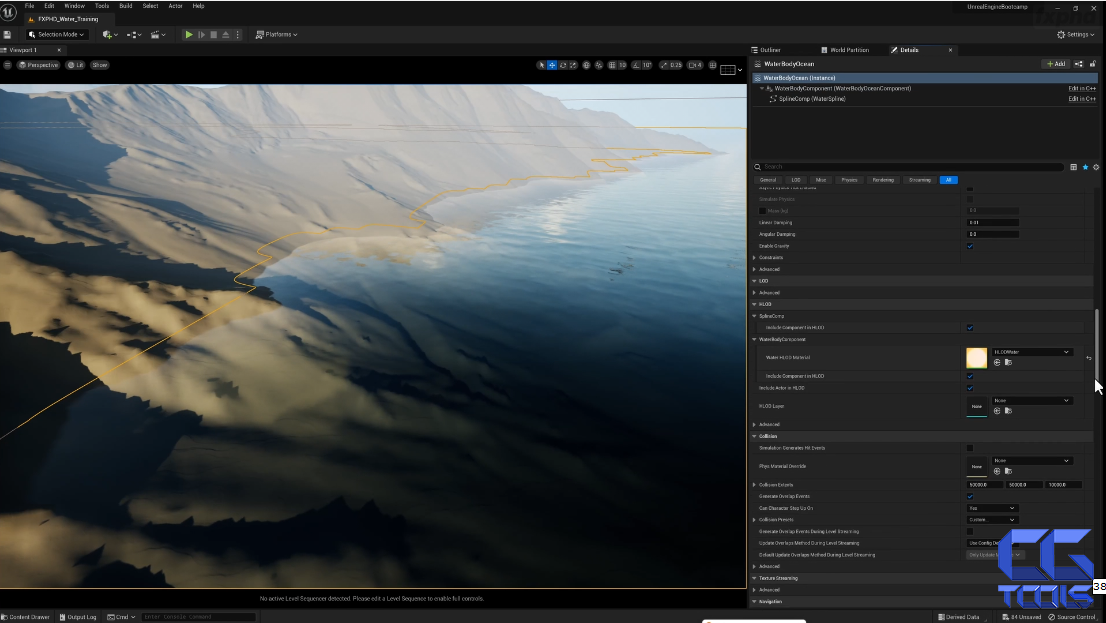
      کلاس 5: آب و اقیانوس
      نحوه راه اندازی و استفاده از سیستم آب داخل Unreal Engine برای ایجاد یک اقیانوس در صحنه موجود جهان خالق. به جای استفاده از خطوط برای ترسیم طرح کلی یک جزیره، از ارتفاع زمین خود برای برش اقیانوس استفاده می کنیم و سپس عمق اقیانوس، شفافیت مواد و ارتفاع موج و سرعت را با استفاده از تمام کنترل های آب و تنظیمات مواد تنظیم می کنیم تا به این نتیجه برسیم. یک نتیجه عکاسی سیستم آب دارای ویژگی‌های خروجی بسیاری از جمله امواج، فوم، جذب، شفافیت و بازتاب است که همگی می‌توانند با ردیابی پرتوهای با جزئیات بالا کار کنند تا نتایج شگفت‌انگیزی ایجاد کنند. ما همه اینها را در بررسی اجمالی دقیق خود از تنظیمات اقیانوس برای آب رشته کوه خود پوشش خواهیم داد.
    مشاهده توضیحاتــ انگلیسی


    Unreal Engine Bootcamp, Part 2 gives a broad and detailed introduction to using Unreal Engine to create cinematic photoreal scenes for cinematics. It is especially tailored for VFX artists wanting to take their first steps in Unreal Engine and apply their knowledge to an advanced realtime game engine. It is the followup to Unreal Engine Bootcamp, Part 2 which was previously released

    The course will cover a breadth of software including Autodesk Maya, Substance Painter, World Creator, Metahuman Creator and the water plugin system for Unreal Engine.

    Liam Whitehouse is an Australian based Senior VFX artist, who has been in the 3D industry since 2003. He has worked on various projects over the past 18 years including most recently the photorealistic canyon environments for The Falcon and the Winter Soldier on Disney Plus, and the hollow earth environments for Godzilla vs Kong, as well as VFX work on other upcoming high profile feature films and episodic series.
    Class Listing
    Class 1: UE Nanite Geometry and Lumen Realtime Global Illumination
    An introduction to the UE Nanite Geometry and Lumen Realtime Global Illumination systems in Unreal Engine. Nanite is an amazing high resolution geometry system which was designed as a geo version of virtual texturing which allows for large amounts of data to be streamed into the viewport only based on what the camera sees allowing for huge polycounts on assets.

    Previously Zbrush models were baked into normal maps which were then used to create fake curvature and details on low poly geometry, but now high polygon geometry can be converted to Nanite meshes and played back in the viewport at amazing high framerates previously not available to high poly counts.

    Lumen is a fantastic realtime indirect lighting system which is new in Unreal Engine 5 which allows for dynamic bounced lighting without baking lighting into the environment using lightmaps. It's very realistic and has beautiful cinematic reflected light and colour from materials in the scene as well as soft shadows in shadowed parts of the environment. We will take a look at how to set it up in a light performant demo scene.
    Class 2: Texturing of Hard Surface Models
    In the second class we will learn the process of using Autodesk Maya and Substance Painter to complete texturing of hardd surface models for Unreal Engine. Autodesk Maya is an industry standard for high detailed vehicles, environments and character models and it can be paired with Unreal Engine to create highly detailed and rigged assets which can be used in cinematics. By setting up the materials in Maya, assets can be imported into Unreal Engine for material assignment.

    Substance Painter is a smart texturing software which can use the curvature, ambient occlusion and thickness of 3D models to add automatic smart materials to assets like scratches, aging, dents etc. It's become a highly valuable tool by texture artists due to it's extensive library of pre-made textures and it's intuitive and user friendly painting and decal system. We will create textures in Substance Painter for the jet then import it into Unreal Engine.
    Class 3: Physical Materials
    In the third class we will dive into Physical Materials in UE5.1 and look at assigning Materials to match photographic reference imagery. Using our textures and materials from Substance painter we will attach them to a material network in Unreal Engine and dial in the material settings to get the best results. The material creation process in Unreal Engine is very easy to use utliising the node based system for Master Materials and the attributes in Material Instances. We will setup materials in an easy to follow demo scene and then move on to edit the materials on our jet asset.
    Class 4: Metahuman Creator Basics
    An introduction to Metahuman Creator for building character models for UE5. Metahuman creator is a new character creation system which allows premade or custom digital humans to be modified and adjusted in an easy to use character creation GUI. Rather than having to hand model, rig and texture a character you can easily choose between different presets, and then customise their hair, eyes, skin and features using simple controls. We will create our own metahuman character and export it to UE5.
    Class 5: Water and Ocean
    How to setup and use the water system inside Unreal Engine to create an ocean on an existing world creator scene. Rather than using splines to draw the outline of an island we will use the height of our terrain to cut out an ocean and then adjust the ocean depth, the material transparency and the wave height and speed using all the water controls and material settings to get a photographic result.

    The water system has many exiting features including waves, foam, absobtion, translucency and reflections which can all work with high detail raytracing to produce amazing results. We will cover all of this in our detailed overview of the ocean setup for our mountain range water.


    تصـاویر نمونـه
    برای بزرگنمایی هر عکس بر روی آن کلیک کنید

    ویدئـو پیش نمایش
    این ویدئو نمایش دهنده قسمتی از محتوا میباشد

    دسته بندی محتوا
    .این محتوا شامل دسته بندی های زیر میباشد
    محتوای ویژه Unreal Engine
    جعبـه دانلود
    پسورد کلیه فایل ها www.cgtools.ir میباشد.

    فقط اعضای VIP قادر به دیدن لینک ها میباشند.

    برای ارسال نظر، باید در سایت عضو شوید.

وب سایت سی جی تولز با توجه به نیاز گرافیست ها و تری دی کاران به یک مرجع مناسب، احداث گردیده است تا بتواند همواره نیاز کاربران را در این زمینه ارضاء سازد.
خدمات سایت شامل آموزش های سه بعدی، مدل ها، تصاویر و تمامی نیاز های مورد نیاز سه بعدی کاران میباشد.

:::::::: آخـرین نظراتــ کاربران سایتــ :