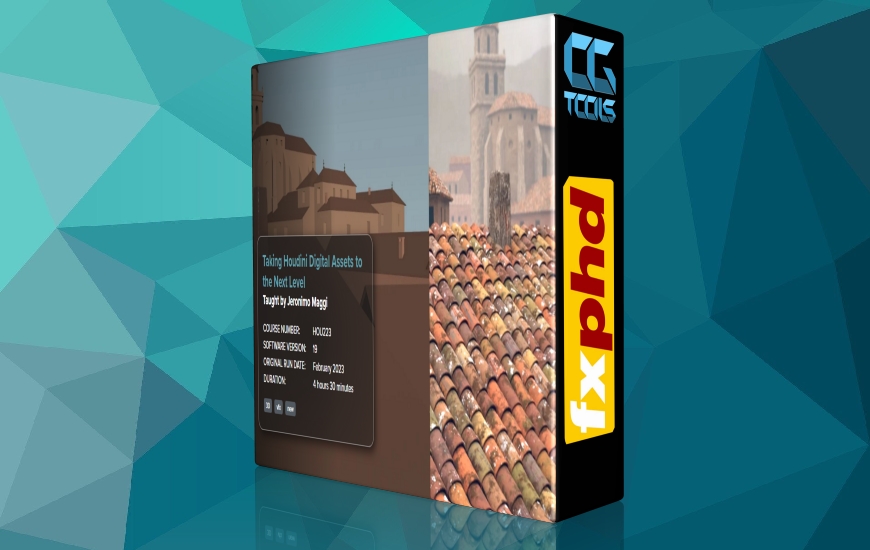
![آموزش ارتقای دارایی های دیجیتال هودینی به سطح بعدی]()
دارایی های دیجیتال در مرکز استفاده روزمره هودینی قرار دارند. شما احتمالا HDA را ایجاد کرده اید و همچنین برخی از آنها را دانلود کرده اید. هدف این دوره تجزیه و تحلیل این است که چه چیزی یک HDA خوب را ایجاد می کند و چگونه می توانید از این مفاهیم برای ایجاد دارایی های دیجیتال قوی تر استفاده کنید. به عنوان ادامه HOU140 - Houdini FX Tool Building Foundation، این دوره متوسط، دانش اولیه هودینی و نحوه عملکرد HDA را در نظر می گیرد.
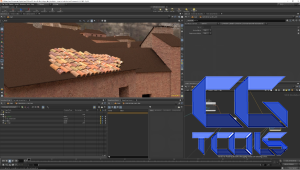
کل دوره حول یک سناریوی تولید واقع گرایانه می چرخد که شامل ایجاد یک دارایی دیجیتال برای ایجاد کاشی های سقف بر روی ساختمان های مختلف است. اولین کلاسها به ایجاد رابط کاربری میپردازند و تکنیکهایی را برای ساختن HDAهای کاربرپسندتر ارائه میکنند. کلاسهای بعدی توسعه را با بهبود عملکرد و زمانهای تکرار HDA و همچنین بهترین روشها برای سازماندهی داخلی HDA، اعتبارسنجی ویژگیهای ورودی و انجام بررسیهای خطا، مستندسازی و اشکالزدایی ادامه خواهند داد.
بخش آخر دوره نکاتی را برای به روز رسانی HDA ها پوشش می دهد و 2 تکنیک جدید برای خودکارسازی تست ها را معرفی می کند که یکپارچگی HDA را با انجام هندسه و مقایسه رندر در پایتون بررسی می کند. آخرین کلاسها برخی نکات و ترفندهای پایتون را پوشش میدهند که میتوانند در HDA اعمال شوند، که منجر به نهایی شدن پروژه تولید کاشیهای سقف میشود. در پایان این دوره شما تکنیک های کافی برای ایجاد HDA های بهتر، قابل اعتمادتر و کاربر پسندتر را یاد خواهید گرفت.
لیست کلاس
کلاس 1: یک HDA خوب چیست؟
این کلاس اول پروژه ای را معرفی می کند که قرار است به عنوان نمونه در کل دوره مورد استفاده قرار گیرد و همچنین راه اندازی برای تولید کاشی های سقف که باید به یک دارایی دیجیتال تبدیل شود را توضیح می دهد. پس از آن، تمرکز بر کاوش در مورد آنچه که یک HDA خوب را ایجاد می کند و دریافت دیدگاه جدیدی در مورد نحوه نزدیک شدن بهتر به فرآیند ایجاد HDA تغییر خواهد کرد.
کلاس 2: رابط کاربری
این درس گفتگوی جدید برای ایجاد HDA در Houdini 19.5 و نحوه بهینه سازی فضاهای نام و نسخه ها را پوشش می دهد. پس از آن، نصب کاشی های سقف در حالی که تمام مفاهیم آموخته شده در کلاس قبلی را اعمال می کند، به یک دارایی دیجیتال تبدیل می شود. تمرکز اصلی بر ایجاد رابط کاربری با ارتقای پارامترها و مشاهده بهترین شیوهها و نکات و ترفندها برای نازک نگه داشتن رابط کاربری، سازماندهی شده و استفاده آسان خواهد بود.
کلاس 3: سازماندهی داخلی، قسمت 1
مرحله بعدی پاکسازی HDA است. این کلاس بهترین روشها مانند استفاده از ویژگیهای داخلی برای جلوگیری از برخورد با ویژگیهای موجود، صریح بودن در مورد اینکه چه ویژگیهایی توسط HDA خروجی میشوند و حفظ همه ویژگیها و توپولوژی موجود را پوشش میدهد. بسیاری از این مفاهیم ابتدا با ابزار جدید HDA برای حذف موارد اولیه بر اساس مساحت یا محیط آنها اعمال خواهند شد.
کلاس 4: سازماندهی داخلی، قسمت 2
در ادامه مفاهیم کلاس آخر، به خواندن صریح ویژگیهای ورودی میپردازد، در حالی که صرفاً فرض میکنیم و همچنین جزئیات کوچکتری را که میتوان به HDA اضافه کرد تا کاربرپسندتر شود. کلاس به بررسی چگونگی بهبود عملکرد با استفاده از مانیتور عملکرد ادامه میدهد و در نهایت به چند تکنیک میپردازد تا گردشهای کاری را که پاسخگویی HDA را بهبود میبخشد و تکرار آن را سریعتر میکند، بررسی میکند.
کلاس 5: برگه گره و بررسی خطا
این کلاس با پوشش نحوه استفاده از هندسه راهنما، گره های پیام و پارم های توصیفی تب Node در HDA آغاز می شود. در مرحله بعد، یک مرحله بسیار مهم در ایجاد یک دارایی دیجیتال اعتبارسنجی در صورتی است که تمام داده های مورد نیاز به درستی وارد شوند. این می تواند شامل بررسی اینکه آیا یک ویژگی وجود دارد، آیا از نوع یا کلاس مناسب است و آیا هندسه ورودی از نوع مناسب است یا خیر. این درس تکنیکی را برای اعتبارسنجی دادههای ورودی و نحوه گزارش هر گونه خطا به روشی دوستانهتر ارائه میکند تا کاربران بتوانند بهتر درک کنند که چرا HDA کار نمیکند.
کلاس 6: اشکال زدایی و مستندسازی
یکی از مراحلی که معمولاً در هنگام ایجاد HDA فراموش می شود، مستندسازی است. این کلاس بهترین شیوهها را برای مستندسازی HDA با استفاده از نشانهگذاری ویکی هودینی، سازماندهی گرهها با استفاده از یادداشتهای چسبنده و نظرات گره و همچنین کامنتگذاری کدهای VEX و پایتون را بررسی میکند. همچنین برخی از شیوه های خوب برای ایجاد بصری سازهایی را پوشش می دهد که در آینده هنگام اشکال زدایی به راحتی قابل دسترسی باشند.
کلاس 7: به روز رسانی و نگهداری
HDA به طور مداوم در حال تکامل هستند. چه یک اشکال یا یک ویژگی جدید، داراییهای دیجیتال تغییر میکنند. این کلاس بهترین شیوه ها را در مورد به روز رسانی HDA ها بررسی می کند. دارایی دیجیتال تایل سقفی بهروزرسانی میشود تا انعطافپذیرتر باشد و ویژگیهای بیشتری را در بر بگیرد. این درس به نسخهسازی HDAها و نحوه برخورد با افزودن و حذف ویژگیها و پارامترهای جدید و پیامدهای آن برای کاربر نهایی میپردازد.
کلاس 8: آزمایش
این کلاس به اهمیت آزمایش HDA و نحوه اعمال آن در زمینه دارایی های دیجیتال می پردازد. در مورد چگونگی ایجاد و اجرای تست ها و همچنین اهمیت آنها در هنگام ساختن توضیح می دهد
تغییرات در HDA تکنیک های مختلف برای ایجاد و خودکارسازی تست ها با مقایسه رندرها و هندسه در پایتون معرفی خواهند شد.
کلاس 9: فیلمنامه نویسی
این درس به برخی از موارد استفاده پایتون برای HDAها مانند اسکریپتهای منو، تماسهای رویداد و ذخیرهسازی میپردازد. در این مقاله به نمونههایی از تماسهای رویداد، نحوه ایجاد یک اسکریپت منوی سفارشی و نحوه ذخیره دادههای منو برای بهبود عملکرد HDA پرداخته میشود. در نهایت ایجاد یک ابزار منوی برگه سفارشی را پوشش می دهد که می تواند چندین گره ایجاد کند.
کلاس 10: نهایی کردن پروژه
این کلاس پایانی به نهایی کردن پروژه و استفاده از HDA ایجاد شده در تمام درسهای قبلی میپردازد تا در نهایت کاشیهایی را تولید کند که در رندر نهایی استفاده میشوند. در نهایت سایه و رندر پروژه را پوشش می دهد.
مشاهده توضیحاتــ انگلیسی
Digital Assets are at the center of everyday use of Houdini. You have probably created HDAs and also downloaded some created by others. The goal of this course is to analyze what makes a good HDA and how you can apply these concepts to create more robust Digital Assets. As a follow up to HOU140 - Houdini FX Tool Building Foundation, this intermediate course assumes some basic knowledge of Houdini and how HDAs work.
The whole course revolves around a realistic production scenario that involves creating a Digital Asset for creating roof tiles on a variety of buildings. The first classes will go over the creation of the user interface and present some techniques for making more user friendly HDAs. The next classes will continue the development by improving the performance and the iteration times of the HDA as well as best practices for organizing the internals of the HDA, validating input attributes and performing error checks, documenting and debugging.
The last part of the course will cover tips for updating HDAs and introduce 2 new techniques for automating tests that check the integrity of the HDA by performing geometry and render comparisons in Python. The last classes will cover some more Python tips and tricks that can be applied to HDAs, which will lead to the finalization of the roof tiles generator project. By the end of this course you will have learned enough techniques to create better, more reliable and more user friendly HDAs.
Class Listing
Class 1: What makes a good HDA?
This first class will introduce the project which is going to be used as an example throughout the whole course as well as explain the setup for generating roof tiles that needs to be turned into a Digital Asset. Afterwards, the focus will shift to exploring what makes a good HDA and getting a new perspective on how to better approach the HDA creation process.
Class 2: The User Interface
This lesson will cover the new dialog for creating HDAs in Houdini 19.5 and how to best leverage namespaces and versions. After, the roof tiles setup will start to be converted into a Digital Asset while applying all the concepts learned in the previous class. The main focus will be on creating the user interface by promoting parameters and looking at best practices and tips and tricks to keep the UI lean, organized and easy to use.
Class 3: Organizing the Internals, Part 1
The next step is to clean up the HDA. This class will cover the best practices such as using internal attributes to avoid clashing with existing ones, being explicit about what attributes are being output by the HDA and maintaining all existing attributes and topology. Most of these concepts will first be applied with a new utility HDA for deleting primitives based on their area or perimeter.
Class 4: Organizing the Internals, Part 2
Continuing the concepts from the last class, it will go over explicitly reading input attributes as opposed to just assuming it as well as other smaller details that can be added to HDAs to make them even more user friendly. The class will continue exploring how to improve the performance using the performance monitor and finally it will go over a few techniques to allow for workflows that will improve the responsiveness of the HDA to make it faster to iterate.
Class 5: Node Tab and Error Checks
This class will start by covering how to use the guide geometry, message nodes and descriptive parms of the Node tab of the HDA. Next, a very important step in creating a Digital Asset is validating if all the required data is being correctly input. This can involve checking if an attribute is present, if it’s of the right type or class and if the input geometry is of the right type. The lesson will go over a technique to validate input data and how to report any errors in a more friendly way so users can better understand why the HDA isn’t working.
Class 6: Debugging and Documentation
An often forgotten step when it comes to creating HDAs is documentation. This class will go over the best practices for documenting HDAs using Houdini’s Wiki Markup, organizing nodes by using sticky notes and node comments as well commenting VEX and Python code. It will also cover some good practices for creating visualizers that can be easily accessed in the future when debugging.
Class 7: Updating and maintaining
HDAs are continuously evolving. Whether it’s a bug fig or a new feature, Digital Assets are bound to change. This class will go over the best practices when it comes to updating HDAs. The roof tile Digital Asset will be updated to be more flexible and include some more features. The lesson will go over versioning HDAs and how to deal with adding and removing new features and parameters and what the implications are for the end user.
Class 8: Testing
This class will cover the importance of testing HDAs and how it can be applied in the context of Digital Assets. It will go over how tests can be created and run as well as their importance when it comes to making
changes to the HDA. Different techniques to create and automate tests by comparing renders and geometry in Python will be introduced.
Class 9: Scripting
This lesson will go over some Python use cases for HDAs such as menu scripts, event callbacks and caching. It will go over examples of event callbacks, how to create a custom menu script and how to cache menu data to improve the performance of the HDA. Finally it will cover creating a custom tab menu tool that can create multiple nodes.
Class 10: Project finalization
This final class will go over finalizing the project and using the HDA created in all the previous lessons to finally generate the tiles that will be used in the final render. Finally it will cover the shading and rendering of the project.
